
Faux Calligraphy Basic to Advance Guide for Beginners
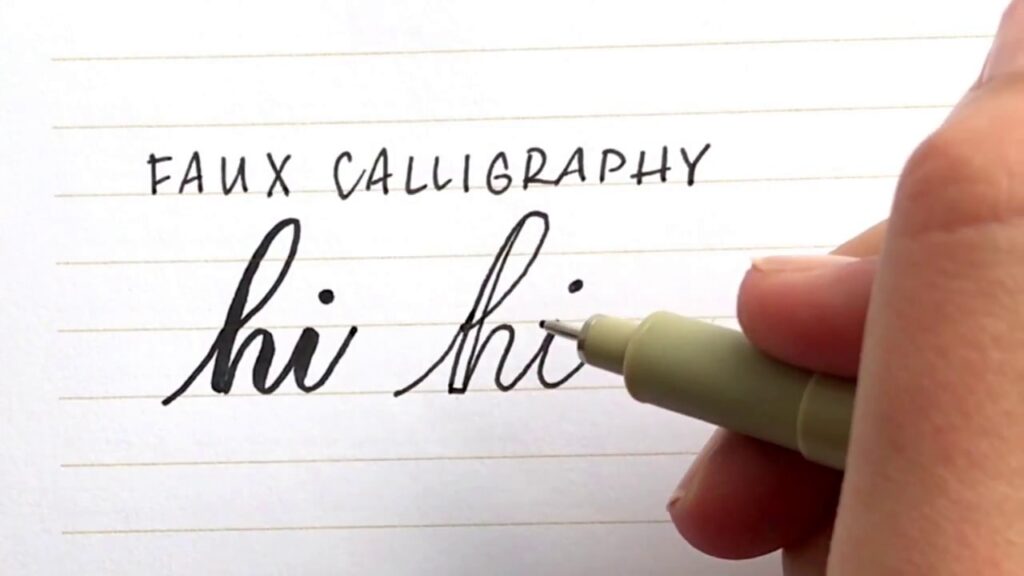
Faux calligraphy ‘‘Faux’’ means made in imitation, false, fake.
The simplest and funniest way to practice calligraphy is ‘Faux calligraphy’.It is also known as fake calligraphy.
With the help of any kind of writing tool, you can do Faux Calligraphy.
Effects get created with the addition of an additional stroke to the downward stroke.
Faux calligraphy is somehow, same as normal calligraphy, the only difference is you can do it with any regular pen or pencil.
You don’t need any fancy nibs or brush pens. And, this makes faux calligraphy so alluring – there is no cost to getting started. You can practice with abandon use of your old pens.
I recommend you to learn Faux Calligraphy first, before learning modern calligraphy due to three essential reasons.
1. It gives you a soft approach to modern calligraphy.
2. It offers an alternative way of doing calligraphy on nearly every surface.
3. You can practice it at any time.
Tools needed for faux calligraphy
Here, I will use some of the additional items rather than a pen which will help us in gaining better results.
And as I mentioned earlier only that the best part of Faux is you can do it with any writing tool you have.
“List of items which I will be using in this tutorial”
- Paper
- Rolling Ruler
- Mechanical Pencil
- Eraser
- FineLiner
Paper
I will be using HP premium paper it is ideal for color presentations, proposals, and other important business documents.
Rolling Ruler
It will help us in drawing guidelines. One of the best tools for drawing guidelines
Mechanical Pencil

A basic requirement for drawing any kind of lettering or calligraphy. is ‘mechanical pencil’.
Eraser
We are humans and humans make mistakes. So for correcting our mistakes will be needing this.
Fineliner
Here, I will be using the ‘Sakura Micron’ fineliner. You can use any of the fineliner you wish.
You might be wondering that why included the pencil and the ruler in the list.
So here is your answer…
Because we’ll be using the pencil and the ruler for two Essential elements in the process.
Two Essential elements are:-
1. Guidelines
2. Sketching
Guidelines
If you are a beginner then guidelines are very helpful for you. It doesn’t matter what technique or style you are practicing, guidelines will always help you.
It just takes a few seconds to draw a couple of lines with the help of a ruler and it will help you in keeping your letters nice and consistent.
Sketching
Prepping your letters is an excellent way. If you feel like skipping this step it totally depends upon you. I’ll be showing you simple and effective sketching.
Note – Graphite can be erased while ink can’t.
There are three core rules for faux calligraphy
1. Basic Strokes –
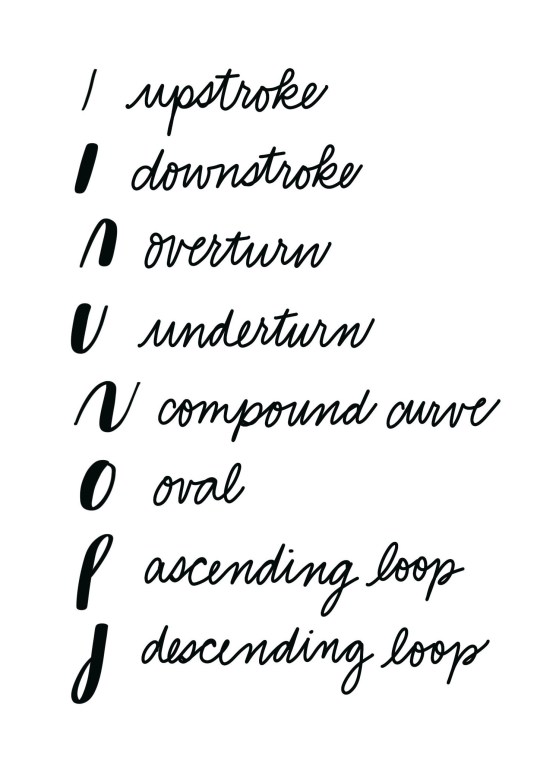
Any calligraphy writing, especially faux calligraphy is a combination of upstroke and downstroke motions.
Upstrokes are thin
Downstrokes are thick
Basic stroke is the best way by which you can learn and practice calligraphy.
For the development of every letter of the lower case, you need to combine 8 basic strokes.
You can get a clean and more consistent look in your calligraphy by using these basic strokes.
2. Consistency –
In Calligraphy one of the most important element is consistency.
You can find the difference between good calligraphy (pleasant look) and lousy calligraphy (unpleasant look).
By using a rolling ruler draw the guidelines and then lay down the letterforms.
It is true that basic strokes help us to improve our consistency, but guidelines are another effective way to achieve consistency. It helps you to keep your letters at the same height and angles.
You need to keep your downstrokes with the same thickness, for consistency in Faux Calligraphy.
3. Adding Thick Downstrokes
For example, you can see this picture below the Blue one is DownStrock and the Pink one is UpStrock.

In faux calligraphy, people feel the most difficulty in adding downstrokes.
While adding downstroke you have to give full attention to where you are adding downstroke and on whichever side you are adding downstroke. So, that you don’t face inconsistent spacing.
One thing which I do and I would like to recommend you is– in letters always try to put thickness in their inner parts.
You know, in letters when you add thickness to their inner part, then between letters you get consistent spacing.
NOTE – It is upon your choice that if you want to add thickness to the outer part of the letter Then it is all right.
No problem is there in adding thickness to the outside of the letter. The thing which matters a lot is you must aware of consistency and spacing.
Five Steps for Faux Calligraphy
Drawing Guidelines
The rolling ruler makes this process very easy!
Don’t worry about the angle of your slant lines. Just follow the guides.
Sketching
If you are just starting to learn calligraphy, then it may help you. It’s purely optional.
You can straight away start with a pen or marker if you are very confident.
Now, start writing words with the help of a mechanical pencil and the basics calligraphy strokes.
Take your time and do it correctly.
Maintain the same height and angles.
Identifying Downstrokes
The exact opposite of upstrokes is downstrokes. When your pen moves downward the paper then a downstroke is created.
As we consider downstrokes to be thick you need to apply pressure to your pen while you draw them.
Remember, up is thin while down is thick.
Add downstrokes, inside each letter.
Ink and Filling
When your sketch is ready then you need to ink it and fill in the downstrokes.
Step5. Erasing the pencil marks
After giving some time to the ink to get dry. Erase all the pencil marks.
With this, you won’t get pesky ink smudges on your fresh paper.
A Bonus Tip
If you think that while watching movies or any show you can practice your work, then don’t think of perfect work.
For getting good results sit in a proper way, have proper light, and you should have your proper attention in your work.
You need to practice a lot to be a good calligrapher.
This youtube video will really help you to improve your faux calligraphy technique.
Final Words
Take a moment and appreciate your petitions that you reach the end of this article I hope this article might help you to start your calligraphy journey.
If you be consistent and mindful about your practice and if you stick to the basics of it then definitely you’ll get Progress.
Comment Down and tell us if this post will help you. for more just connect with our CalligraphyCity Community We make calligraphy Easy…