iPad Lettering & Calligraphy Tutorial Pro Tips | How To Use Procreate
Hey, guys welcome to today’s post which I’ll be giving you a tutorial on fresh iPad Lettering or calligraphy on your iPad so stay around.
Whether you’re a beginner just starting with your iPad Lettering or you’re kind of advanced and already know a lot there are so many tips in this post that are gonna help you improve your calligraphy on good notes and notability.
So let’s get into it when I first started with Lettering or calligraphy I mean I was already at it.
I had a lot of practice beforehand with regular brush pens but basically, I just practiced a lot took a lot of inspiration from Pinterest.
I’m just gonna be showing you everything I’ve learned in the past couple of years the first step is let’s get into supplies that you need for iPad Lettering or calligraphy.
Table of Contents –
This article is going too quite long so this table of content helps you to find your desired sections part or a topic that you want to read.
Each of these Topics has more sub-topics below –
-
Requirements
-
Procreate Tutorial
-
Basics of calligraphy
-
Good Notes
-
Notability
-
Conclusion
Requirements For iPad Lettering or Calligraphy
Basic Requirements for iPad lettering or an iPad calligraphy are:
- iPad or iPad Pro
- Apple Pencil 1 & 2
- Matte Screen Protector
- Procreate App
iPad
The first thing you need is the iPad I’m using an iPad pro here is the newest one it’s 12.9 inches.
Apple Pencil
The next is an apple pencil which is a must need second or first-generation depending on your iPad but this is a must need because it has pressure sensitivity.
So you can push harder and like lighter and it’ll have different strokes if you do it with your finger it really won’t work and I kind of learned this the hard way.
Basically, you can hold your pencil any way you want something that’s comfortable try the tripod grip just hold it on an angle the next.
Matte Screen Protector
What I like is a…
Matte Screen Protector
I’m using the paper-like which is really good and it provides good friction for doing calligraphy.
Procreate App
And the last one you need is the procreate app doing the calligraphy or lettering.
Now let’s jump into the main topic……..
Procreate Tutorial for iPad Lettering
We’ll start off with the procreate tutorial so first off you’re going to calligraphy and you’re going to choose the brush pen they have this normal standard one that works kind of well.
So it’s currently on rendering and light glaze and it makes this brush pen look kind of faded and like light, I personally don’t like it it gives like this watercolor appeal I’m not a fan of it.
if you change the too intense blending it’ll be:
Super Thick
And
Like Dark
That’s how I like it but that’s just my personal preference.
I also have my own brush pen I made here it was kind of fun to make and cool but anyway this is just like the comparison between…
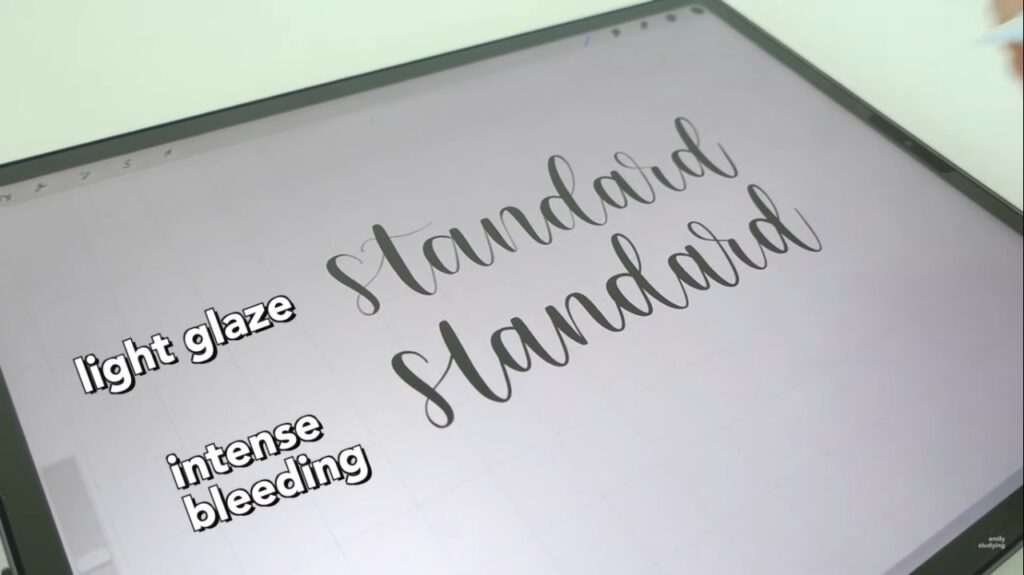
The Light Glaze
And
The Dark Glaze.
I personally just think it looks kind of like not as neat compared to like intense blending.
Where it’s nice and dark and this is like what most calligraphy artists you see on Instagram and like youtube use they use a darker brush pen but this is all your personal preference.
Another pro tip is you gotta have it all the way on streamline so a hundred percent I guess it’s like kind of a lie we’ve been telling you but basically, it just likes smooths everything.
But when you don’t have streamline on lines are all wobbly and just kind of crooked so that’s why I really like streamlining.
Procreate Tips
My next tip is to turn on the grid and this just helps you with spacing and like getting everything correct it just makes your life a whole lot easier when drawing.
Basics of Calligraphy or Lettering
So I’m going to get into the basics of calligraphy which are very short just like the introduction basically you’re going to want to apply pressure on the downstroke so basically thick down and then on the upstrokes, it’s basically thin up.
Like lightly press it up and you want this for consistent strokes try to make it as even as possible and now you’re gonna try to connect up and down and down and up.
it’s the quality is okay it was from a while ago but everything still stands on how to do calligraphy and if you don’t know the basics I definitely recommend reading this article.
Try Swirling
Next, we’re gonna try swirling it so basically, I’m just getting used to liking the strokes and how everything is in calligraphy.
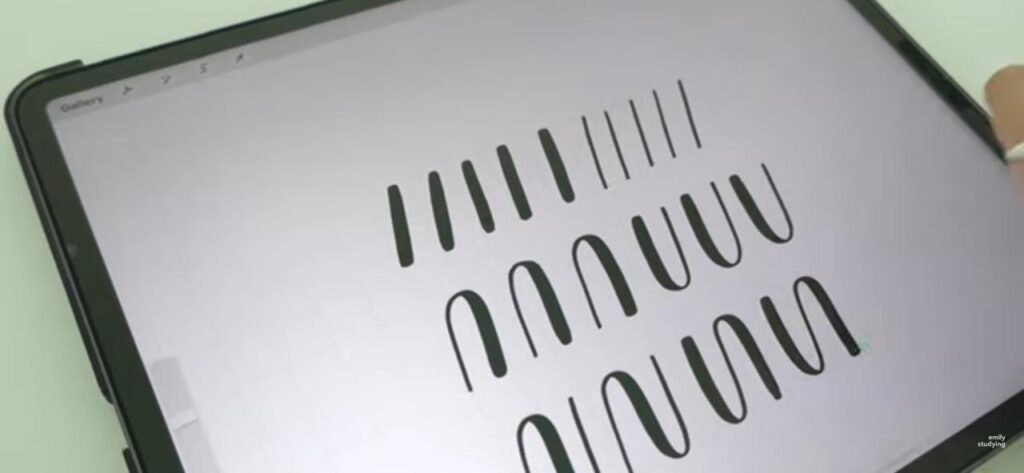
Because these are most of the motions you do when writing and it just helps you make your calligraphy neater and helps you get to the basics and this definitely takes a lot of practice.
Getting used to it did take me a bit longer…..
but I’ve been doing this for quite a while so that’s why it kind of came naturally more to me and next you’re going to want to like practice just words in general and just keep on doing this a lot just do like art whatever you want.
The next tip is to do all your strokes one by one here I’m just like doing it all like just not even lifting my pencil and as you can see it looks a bit messier to me and it’s a bit more wobbly and it’s hard to move your hand.
if you just keep on going all in one and it’s hard to get good strokes but when you lift the apple pencil up and do things in the proper strokes it becomes much easier to do and
everything just becomes simpler and if you don’t really like know how to do calligraphy I definitely recommend checking out some of the practice sheets which I’ll be showing you.
Good Notes for iPad Lettering
So next I’ll be talking about how to use it in good notes…
Obviously, you’re going to need the good notes app and then you’re going to click on the brush pen function and you basically just do the same thing as procreate.
I know this the like brush pen in good notes is like not as like streamlined and it’s a bit wobbly and like the lines look kind of all right but basically, you want to take your time when doing this and do it slowly.
so I’m going to be giving you some tips to change up the pressure sensitivity just to get a feel for it personally.
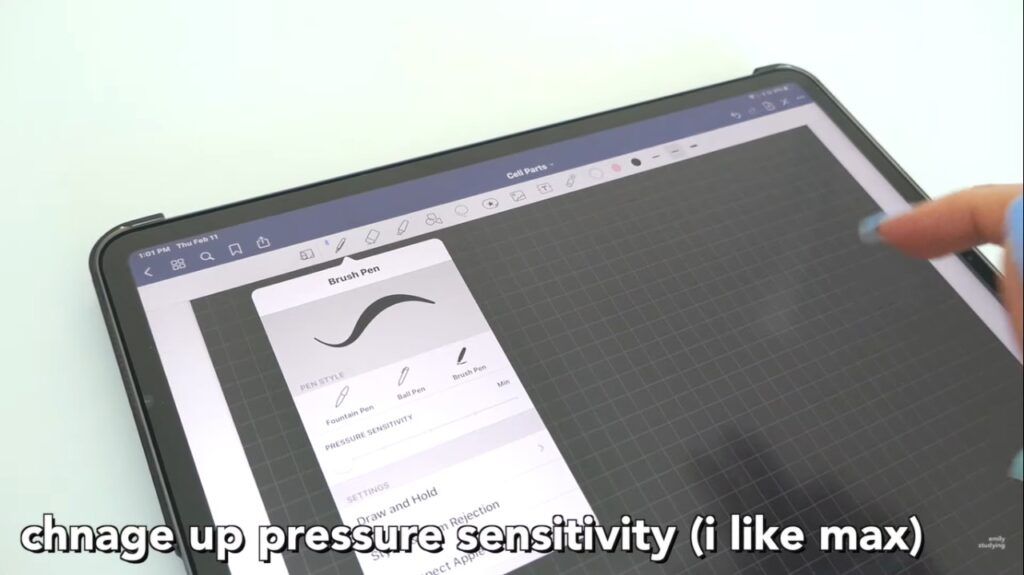
I like it on max this is currently on minimum to see how it feels it looks a bit thinner like you don’t have to put as much pressure but on the maximum, you basically apply the same pressure but the line is a bit thicker.
I like this is because it just gives a better contrast to like the thick and thin to get like that calligraphy look.
Use a Smaller Brush Size
So next, I’m going to give you some more tips.
Always use a smaller brush size what I’m currently using is 0.5 honestly if you go beyond that it gets a bit too thick and hard to get used to and like you want that thick and thin contrast.
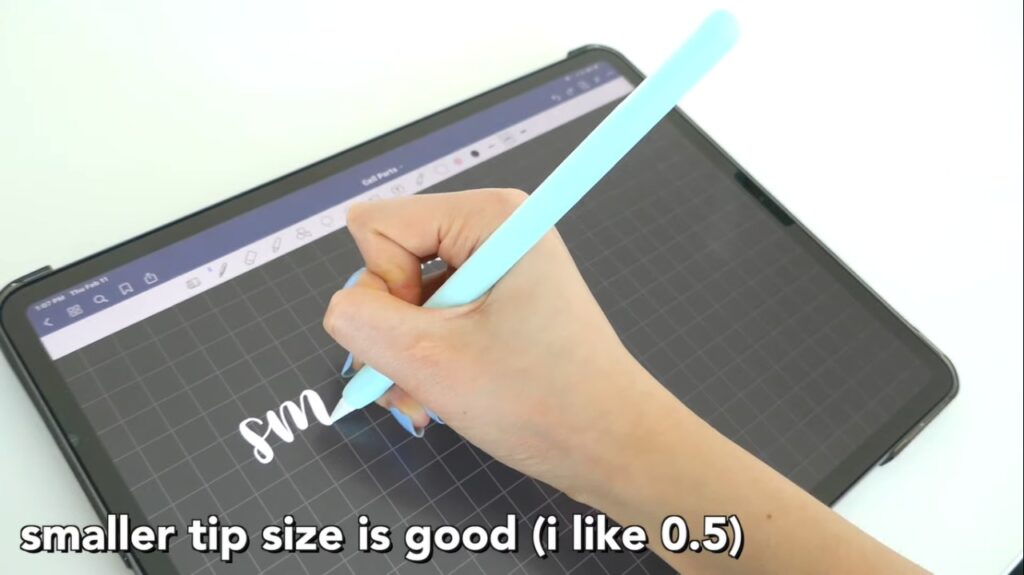
So definitely use like 0.5 or smaller is good don’t go like 0.1
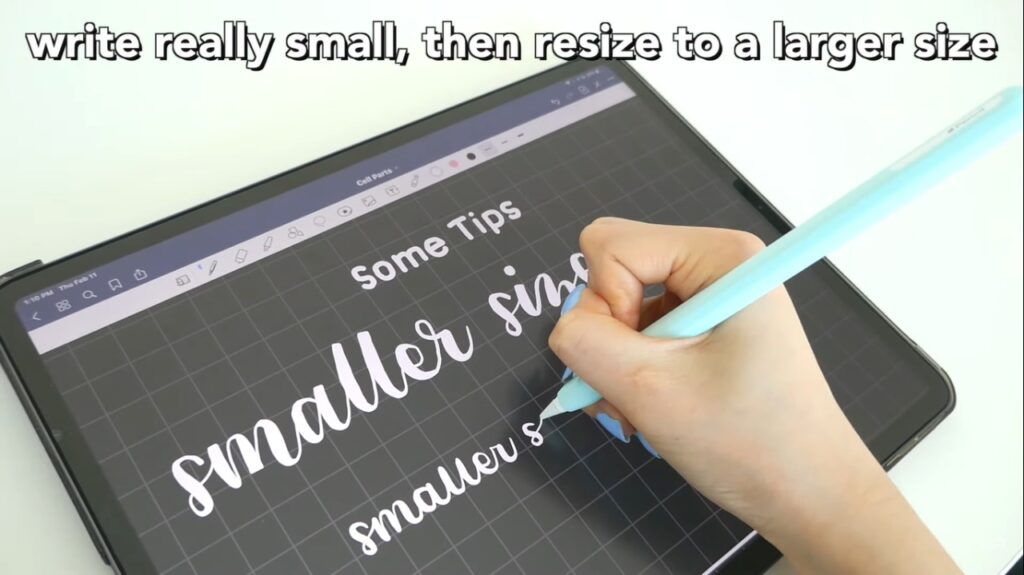
Write Small
the next tip is to write really small so don’t go as big as I was and then resize it to a larger size.
you just write kinda small and then you later resize it to a larger size and it’s just like a little hack pro tip that works really well.
it makes your calligraphy look nice and you can also use the calligraphy practice sheet inside good notes.
just import it to there and then just like start drawing on it you might have to change the size a bit but basically, it’s the same thing and you can practice your strokes.
if you don’t have like procreate anyway if you’re just too lazy to do all of this just use a font like it’s so much easier you can just streamline this entire process
here I just made my own calligraphy font from my own writing on the calligrapher and then it looks the same.
it’s just neater and you don’t have to spend all this time writing and you know if you’re too lazy to do this is just a quick hack for your life I have a whole video on how to make your own font and import it into good notes.
I paid for the pro version here to make a calligraphy font
Notability
So next, I’ll be giving you a quick notability tutorial for iPad Lettering it’s very similar to good notes just like a few things.
personally, I’m just going to say notability has like a better writing experience and everything is just a bit easier for example the brush pen, in my opinion, is much nicer.
definitely a personal thing for me but I’ve also heard people.
Conclusion
Finally, we are done…
this is a pretty long article post about iPad Lettering and calligraphy if you really read this part of the post WOHH!!! men you deserve some respect.
Well, I hope this article would help you and clear your all doubt that’s all enjoy the beautiful calligraphy journey and keep practicing with the patient.
Back soon with interesting calligraphy and lettering article post till then goodbye…