Illuminated Letters – Creating a Lasting Impression
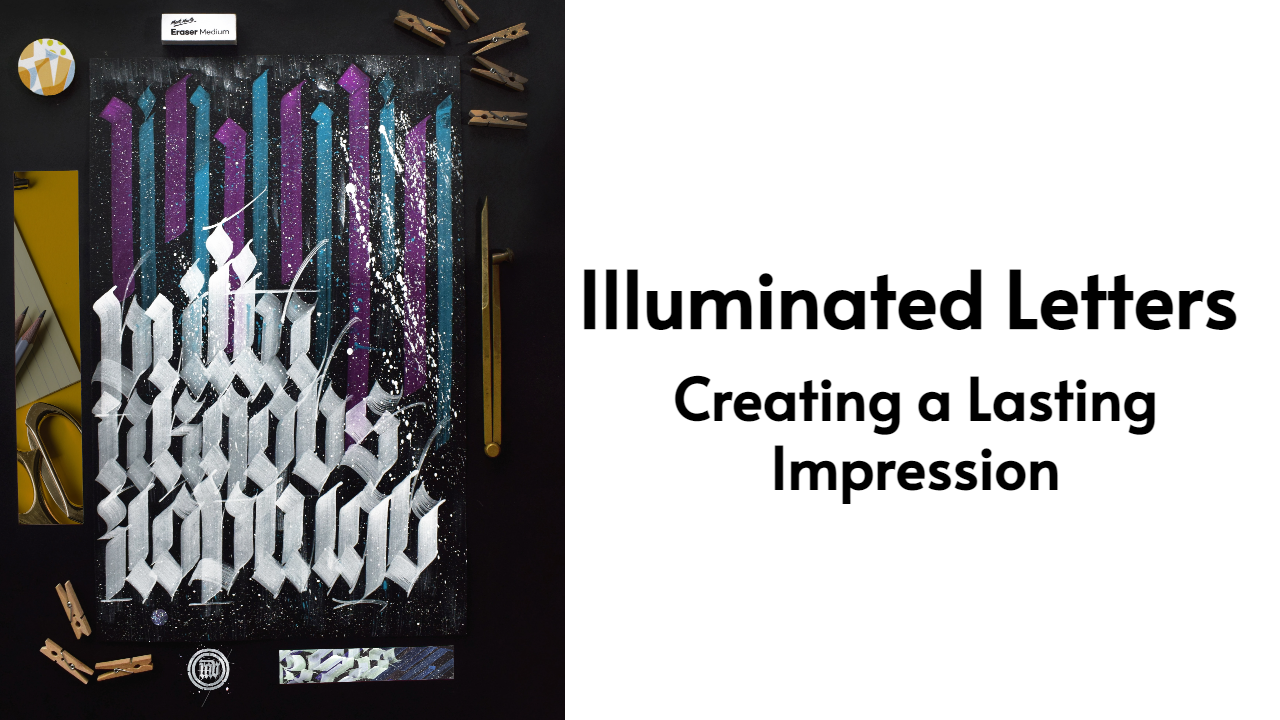
Illuminated Letters are a form of art that has been used for years to create beautiful and lasting impressions.
Also known as illumination or lettering, involve painting, drawing, or writing with gold or silver ink on parchment paper.
This technique is often used to add extra beauty and symbolism to religious texts such as the Bible and Quran.
By using light-reflective materials such as gold leaf and silver paint, can be seen from far away while still maintaining their exquisite detail up close.
The result is an artwork that stands out in any environment – whether it’s a book of scripture or your living room wall. In this article, we will explore how you can use illuminated letters to create a lasting impression with your work.
Explore the History and Origins
Illuminated letters have been used for centuries to create beautiful and lasting impressions.
The origins of this can be traced back as far as the 5th century when they were most commonly used in religious manuscripts and books.
Illuminated letters have since come to symbolize not only religious texts but also artistic expression and beauty.
This has made them a popular choice for many different applications, from writing a letter of love to designing a beautiful calligraphy piece.
Consider the Materials Used for Illuminated Letters
Illuminated letters require specific materials and techniques in order to create the desired effect.
While some modern letters are created using digital tools, most traditional illuminated letters are still made with physical materials.
Gold and silver paint, gold leaf, gouache, and high-quality inks are often used to create the classic illuminated lettering look.
This can make creating somewhat more expensive, but it also ensures that your work will have a luxurious finish that won’t fade over time.
Different techniques used to create illuminated letters
Form of art that has been used for hundreds of years to make things look really nice.
They involve drawing and painting with gold or silver ink on parchment paper.
This makes them sparkly and pretty, so when you look at them from far away they still have lots of detail close up.
People use Illuminati Letters to make religious texts like the Bible and Quran look special, but you can also use them for other things like writing letters or making beautiful pictures.
To create Illuminated Letters, you need paint that is gold or silver, gold leaf (like shiny paper), and inks that are high quality.
Then you can use different techniques to get the desired effect! One of the main techniques is called “gilding”, which means covering something in gold or silver.
This gives the letters a really nice and shiny look. You can also use different painting techniques like shading and highlighting to add depth and definition to your artwork.
Materials you will need for your Project
Creating Illuminated Letters is an art form that requires specific materials and techniques to create the desired effect.
If you want to give it a try, here’s what you’ll need:
- – Gold or silver paint
- – Gold leaf
- – High-quality inks
- – Parchment paper (or other suitable paper)
- – Brushes, pens, or other tools for painting and drawing
- – Optional: gouache paint for additional effects
Once you have all your materials ready to go.
You can start learning about the different techniques used in Illuminated Letters – from gilding to shading – and get creative with your artwork.
With a bit of practice, you’ll be creating beautiful illuminated letters in no time!
A step-by-step guide to the process
Creating Illuminated Letters can be tricky, so here’s a step-by-step guide to get you started:
1. Choose a font –
Start by selecting the font you would like to use for your Illuminated Letter. Keep in mind that some fonts will require more intricate details than others, which may take longer to complete.
2. Sketch out your letter –
Use a pencil to sketch out your letter onto parchment paper. If you’re feeling creative, you can use this opportunity to add details and embellishments around the edges of your letter.
3. Outline your design –
Once you’ve finished sketching out your design, use a fine-tipped pen or brush to outline your letter with gold or silver paint. This will help to give your Illuminated Letter a luxurious and eye-catching look.
4. Add in details –
Once the outline is complete, you can start adding in the finer details using different painting techniques such as shading and highlighting. You can also use gold leaf to add a bit of extra sparkle and shine.
5. Final touches –
Finally, you can add any additional elements around the edges of your Illuminated Letter to create a unique and beautiful piece of art.
And there you have it! With these steps, you’ll be able to create stunning pieces of art that will make a lasting impression.
Creating Illuminated Letters is a great way to show off your artistic skills and create something truly unique.
Whether you’re looking to spruce up religious texts, write letters or make beautiful pictures, Illuminated Letters can help bring your creativity to life!
How to Get Started
Illuminated letters are a great way to add beauty, creativity, and an extra touch of specialness to any artwork.
If you’re new to illuminated lettering, there are plenty of resources online that can help you get started.
There are also calligraphy courses available that will teach you the basics of creating beautiful illuminated letters.
Once you’ve mastered the art, you can start to experiment with different materials, inks, and techniques and create something truly unique.
Whether it’s a love letter or an invitation, your work will make a lasting impression!
Book Recommendations

Books are amazing sources to learn new things.
So here I will recommend some books for learning more about letters.
If you’re looking for more guidance on creating, here are some of the best books available:
- – Illuminated Letters by Timothy Ely
- – Illuminating Lettering by Judith Amiel
- – The Art of Illumination: A Guide to Illuminated Letters by Peter Cope
These books will provide you with the knowledge and techniques you need to create beautiful Letters.
With the right tools, patience, and practice, you can create art that will make a lasting impression!
F&Q for illuminated letters
Q: What materials do I need to create illuminated letters?
A: You will need gold or silver paint, gold leaf, gouache, and high-quality inks.
Q: How long does it take to create illuminated letters?
A: Depending on the complexity of your project and your experience level with creating illuminated letters, it can take anywhere from a few hours to several days.
Q: What is the best way to get started with illuminated letters?
A: There are many resources available online to learn about illuminated letters, such as calligraphy courses and tutorials. Once you have mastered the basics of creating illuminated letters, you can start experimenting with different materials and techniques to create a unique piece of artwork.
Q: How long will illuminated letters last?
A: If you use high-quality materials, your illuminated letters should be able to stand the test of time. They should not fade over time if done properly.
Final Words
This is an art form that can be used to add beauty, creativity, and a special touch to any artwork.
It can seem tricky at first, but with the right steps and materials, it is possible to create beautiful, lasting pieces of art.
The process of creating these letters involves choosing a font, sketching out the letter, outlining the design with paint or ink, adding details and embellishments, and finally giving it a final touch.
Whether you’re looking to make religious texts look more beautiful, This is a great way to show off your creativity and skills.
We hope this guide has helped you understand the basics of Letters and given you a better understanding of what is involved in creating this type of artwork.
