Easy Way To Start Flourishing Your Calligraphy | Flourishing Tutorial For Beginners
Hey, Reader, I hope you were doing well, welcome back to the blog are you worried about flourishing a letter so don’t worry today I’ll tell you the detailed tutorial about calligraphy flourishing.
Before starting, we have to understand what is the meaning of flourishing and why it is important or a very attractive method to decorate your calligraphy things :
What is Flourishing?
Flourishing is another word for embellishing.
When you add embellishments to a letter, then the word looks more decorative and fancy. It ranges from simple to complex.
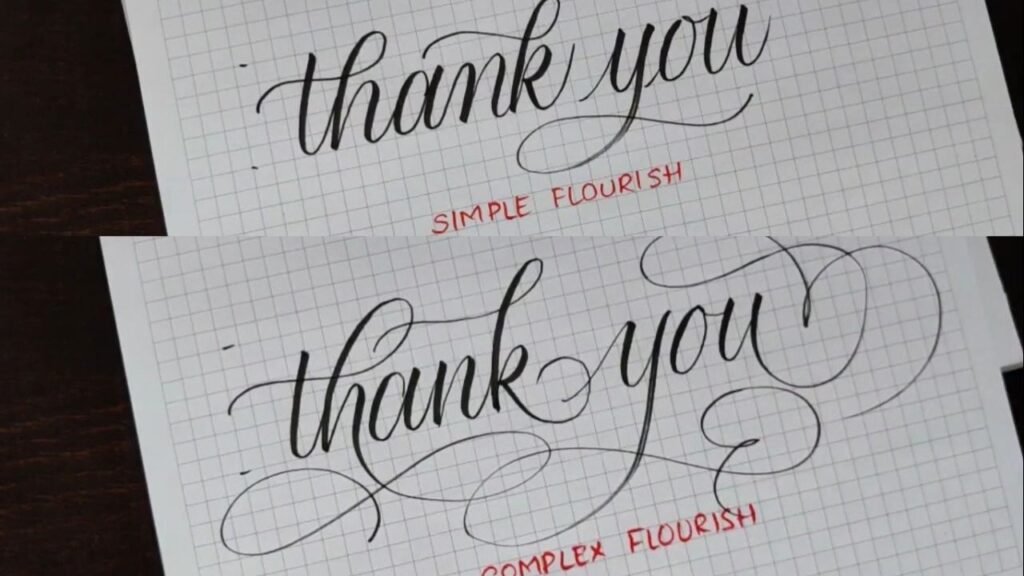
Flourishing is a fancy term basically defined for decorating your calligraphy.
It’s all about the swooshes and swirls which you see are added to various parts of words or letters.
The phrase can turn into an eye-catching work of art with some graceful swoops and loops.
Flourishing a Word
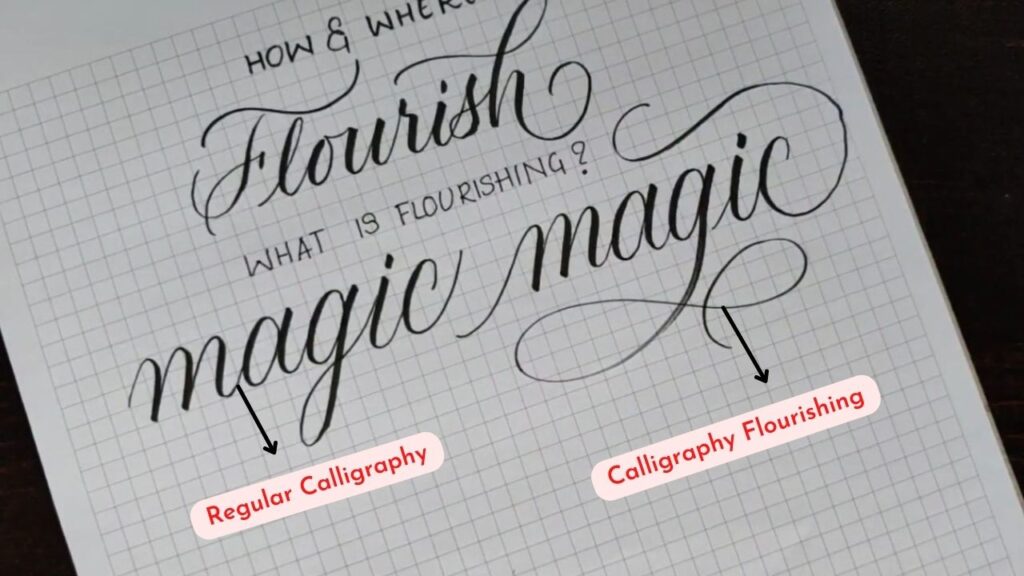
Extend the letter base of the word which is written with embellishments.
This will help you in adding style to the letters and will fill up the space around.
Five Easy Spots to Add a Flourish in a Words
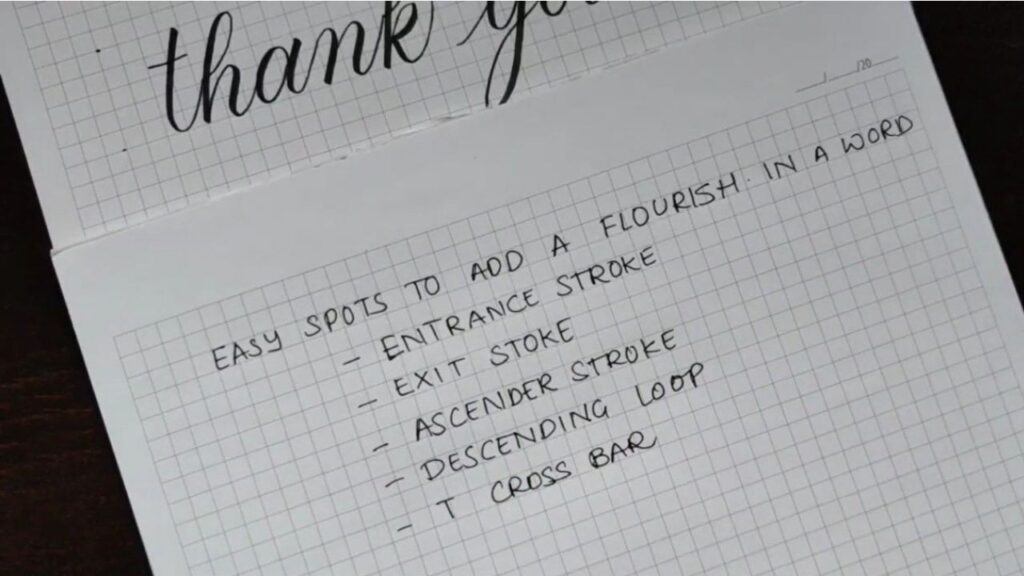
- Entrance Stroke
- Exit Stroke
- Ascender Stroke
- Descending Loop
- T Cross Bar
It will help to make your word remain legible if you add flourishes to these five places (Entrance Stroke, Exit Stroke, Ascender Stroke, Descending Loop, T Cross Bar) rather than drawing the random spots around the letter.
It may happen that the word might not have a loop or T-crossbar.
Whenever you get stuck, just think about these five places and get started.
The Magical Formula
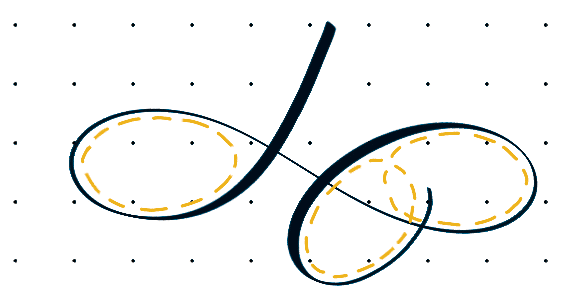
All of the lines are smoothly curved and supported an oval shape.
Oval-based shapes make the flourishes appear graceful and consistent instead of choppy, irregular, or random.
And there also are larger, overarching oval shapes:
The trick is to believe tracing, or “wrapping around”, an oval as you create a flourish.
To put it all at once, the blue represents the bottom letterforms, pink ovals are small ovals within the loops and
curves and purple ovals are overarching shapes:
Flourishing will look more manageable if you break it that way.
The Rules and Drills for Calligraphy Flourishing
Before you jump into flourishing letters, it’ll help to start out with some drills.
The first set of drills will get you won’t create oval shapes from all directions and orientations.
Use a pencil and do them as repeatedly as you’ll until you are feeling comfortable!
In addition to finish ovals, the c-shape and s-shape also are very commonly found in flourishing.
In fact, they are based on the oval!
The c-shape is simply half an oval, and therefore the s-shape is made by two ovals next to every other.
You can comfortably make the c- and s-shapes by using these drills.
When you’re ready to make smooth, consistent ovals, c-shapes, and s-shapes on their own, you’ll feel far more confident using them in your flourishes.
3 Rules for calligraphy flourishing
Here are 3 important rules to stay in mind:
1. To reiterate, flourishes are supported ovals:
2. Lines must cross at a 90-degree angle approximately.
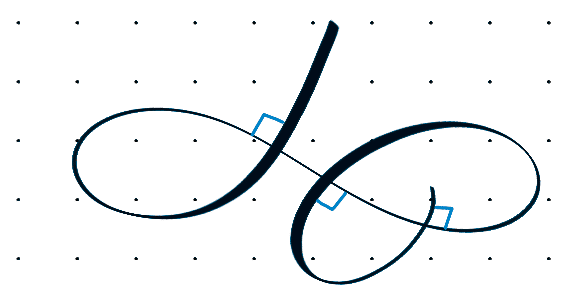
3. Do not cross two thick lines.
You can cross thin-thin and thin-thick:
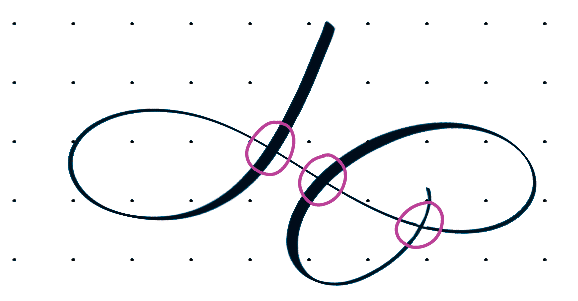
If you retain your flourishes supported the oval shape, cross at 90 degrees, and avoid crossing two thick lines, you’re setting yourself up for successful flourishing!
Putting it into Practice
Let’s return to the highest 5 spots to feature flourishes in your letters:
- Entrance Stroke
- Exit Stroke
- Ascender Stroke
- Descending Loop
- T Cross Bar
Ascender Stroke –
We can use these upper loop flourishes for letters: b, d, f, h, k, and l.
Descending Loop –
We can use lower loops flourishes for letters: f, j, p, q, y, and z.
T-crossbar –
A standard lowercase “t” is crossed with a straight line. To flourish, cross the stem with an easy s-shape or extend with more curves.
You can also flourish at-crossbar is by combining it with a nearby “h”.
Exit Stroke –
These shapes are used at the end of a word or line as long as it doesn’t interfere with the legibility.
The upper loop letters wouldn’t easily be ready to use these because their flourish would run into the letter.
Under the word –
It works best on non-descending letters which will naturally dip down at the end (like r, m, a, n).
The letters that finish upwards to complete the letter shape (like e and c), avoid using this flourish on this type of letter.
Flourish Variations
Now let us go a little deeper on the lower loop flourish.
There are four addresses that we have already learned.
By just changing up the shape you can create endless new flourishes.
Things which we can change are as followed:
- Loop size and angle
- Size of the tail
- Number of intersections
- Spirals
- Adding inner loops
Entry Swashes and Exit
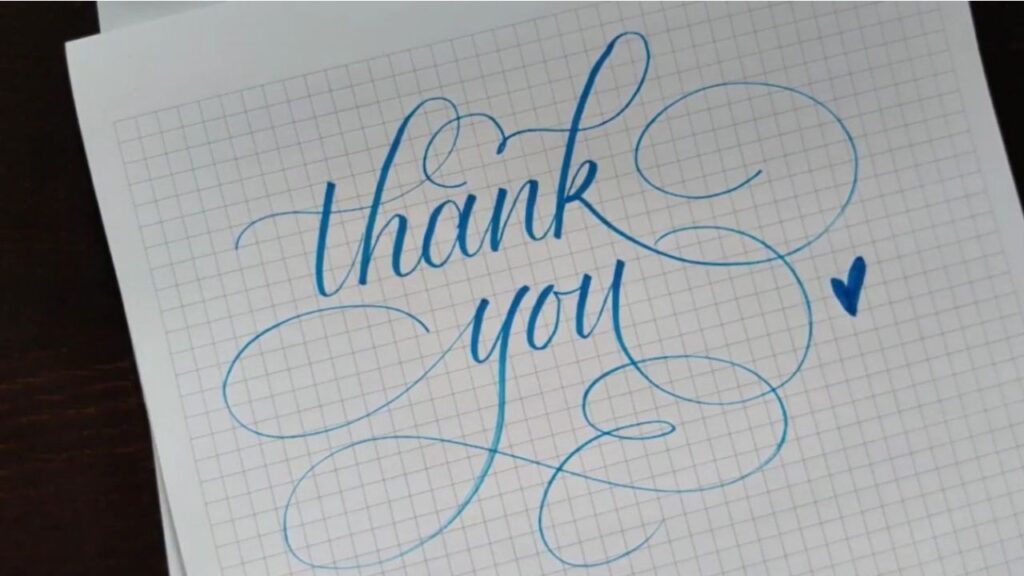
Exit swashes, as well as entry, are two ways by which we can add flourishing to our word. These two ways are very beneficial for our work in words.
While writing short Phrases or a single word on a center of a page is the best way to do our work.
We can add extra finishing to our work by adding this in a plane or non flourished word. Or else we can do is to add it on a simple flourished phrase.
It is very difficult to flourish each and every possible letter in a word.
It is very important that your letters are legible and as we know sometimes less is more.
Always remember that you should never sacrifice legibility when you add style to your word or letter.
Video Tutorial of this post for Clear Understanding
calligraphy flourishing:
Check Out Our Other Tutorials
- Faux Calligraphy Basic to Advance Guide for Beginners
- How to do Modern Calligraphy – Beginners Guide
- How To Use Calligraphy Pen 8 Guide For Beginners
- iPad Lettering & Calligraphy Tutorial Pro Tips | How To Use Procreate
- How to Write in Calligraphy 7 Things You Need to Know
Conclusion
I hope that you like the concept of this blog post calligraphy flourishing I’m pretty sure this post will add some value to your calligraphy journey.
Thanks for showing interest in this post if you are reading this line believe me you are the true calligraphy artist and you have a ton of respect for the art.
